IT'S A TOPPER!

Hello, you lovely lot! How's everyone holding up with the school holidays? Hang in there—not long to go!
Over here, we've been busy prepping for the August bank holiday to ensure your orders still reach you on time. And guess what? Our new autumn moulds are dropping tomorrow! They’re absolutely adorable, and I’m already obsessed. That should keep your morale up!
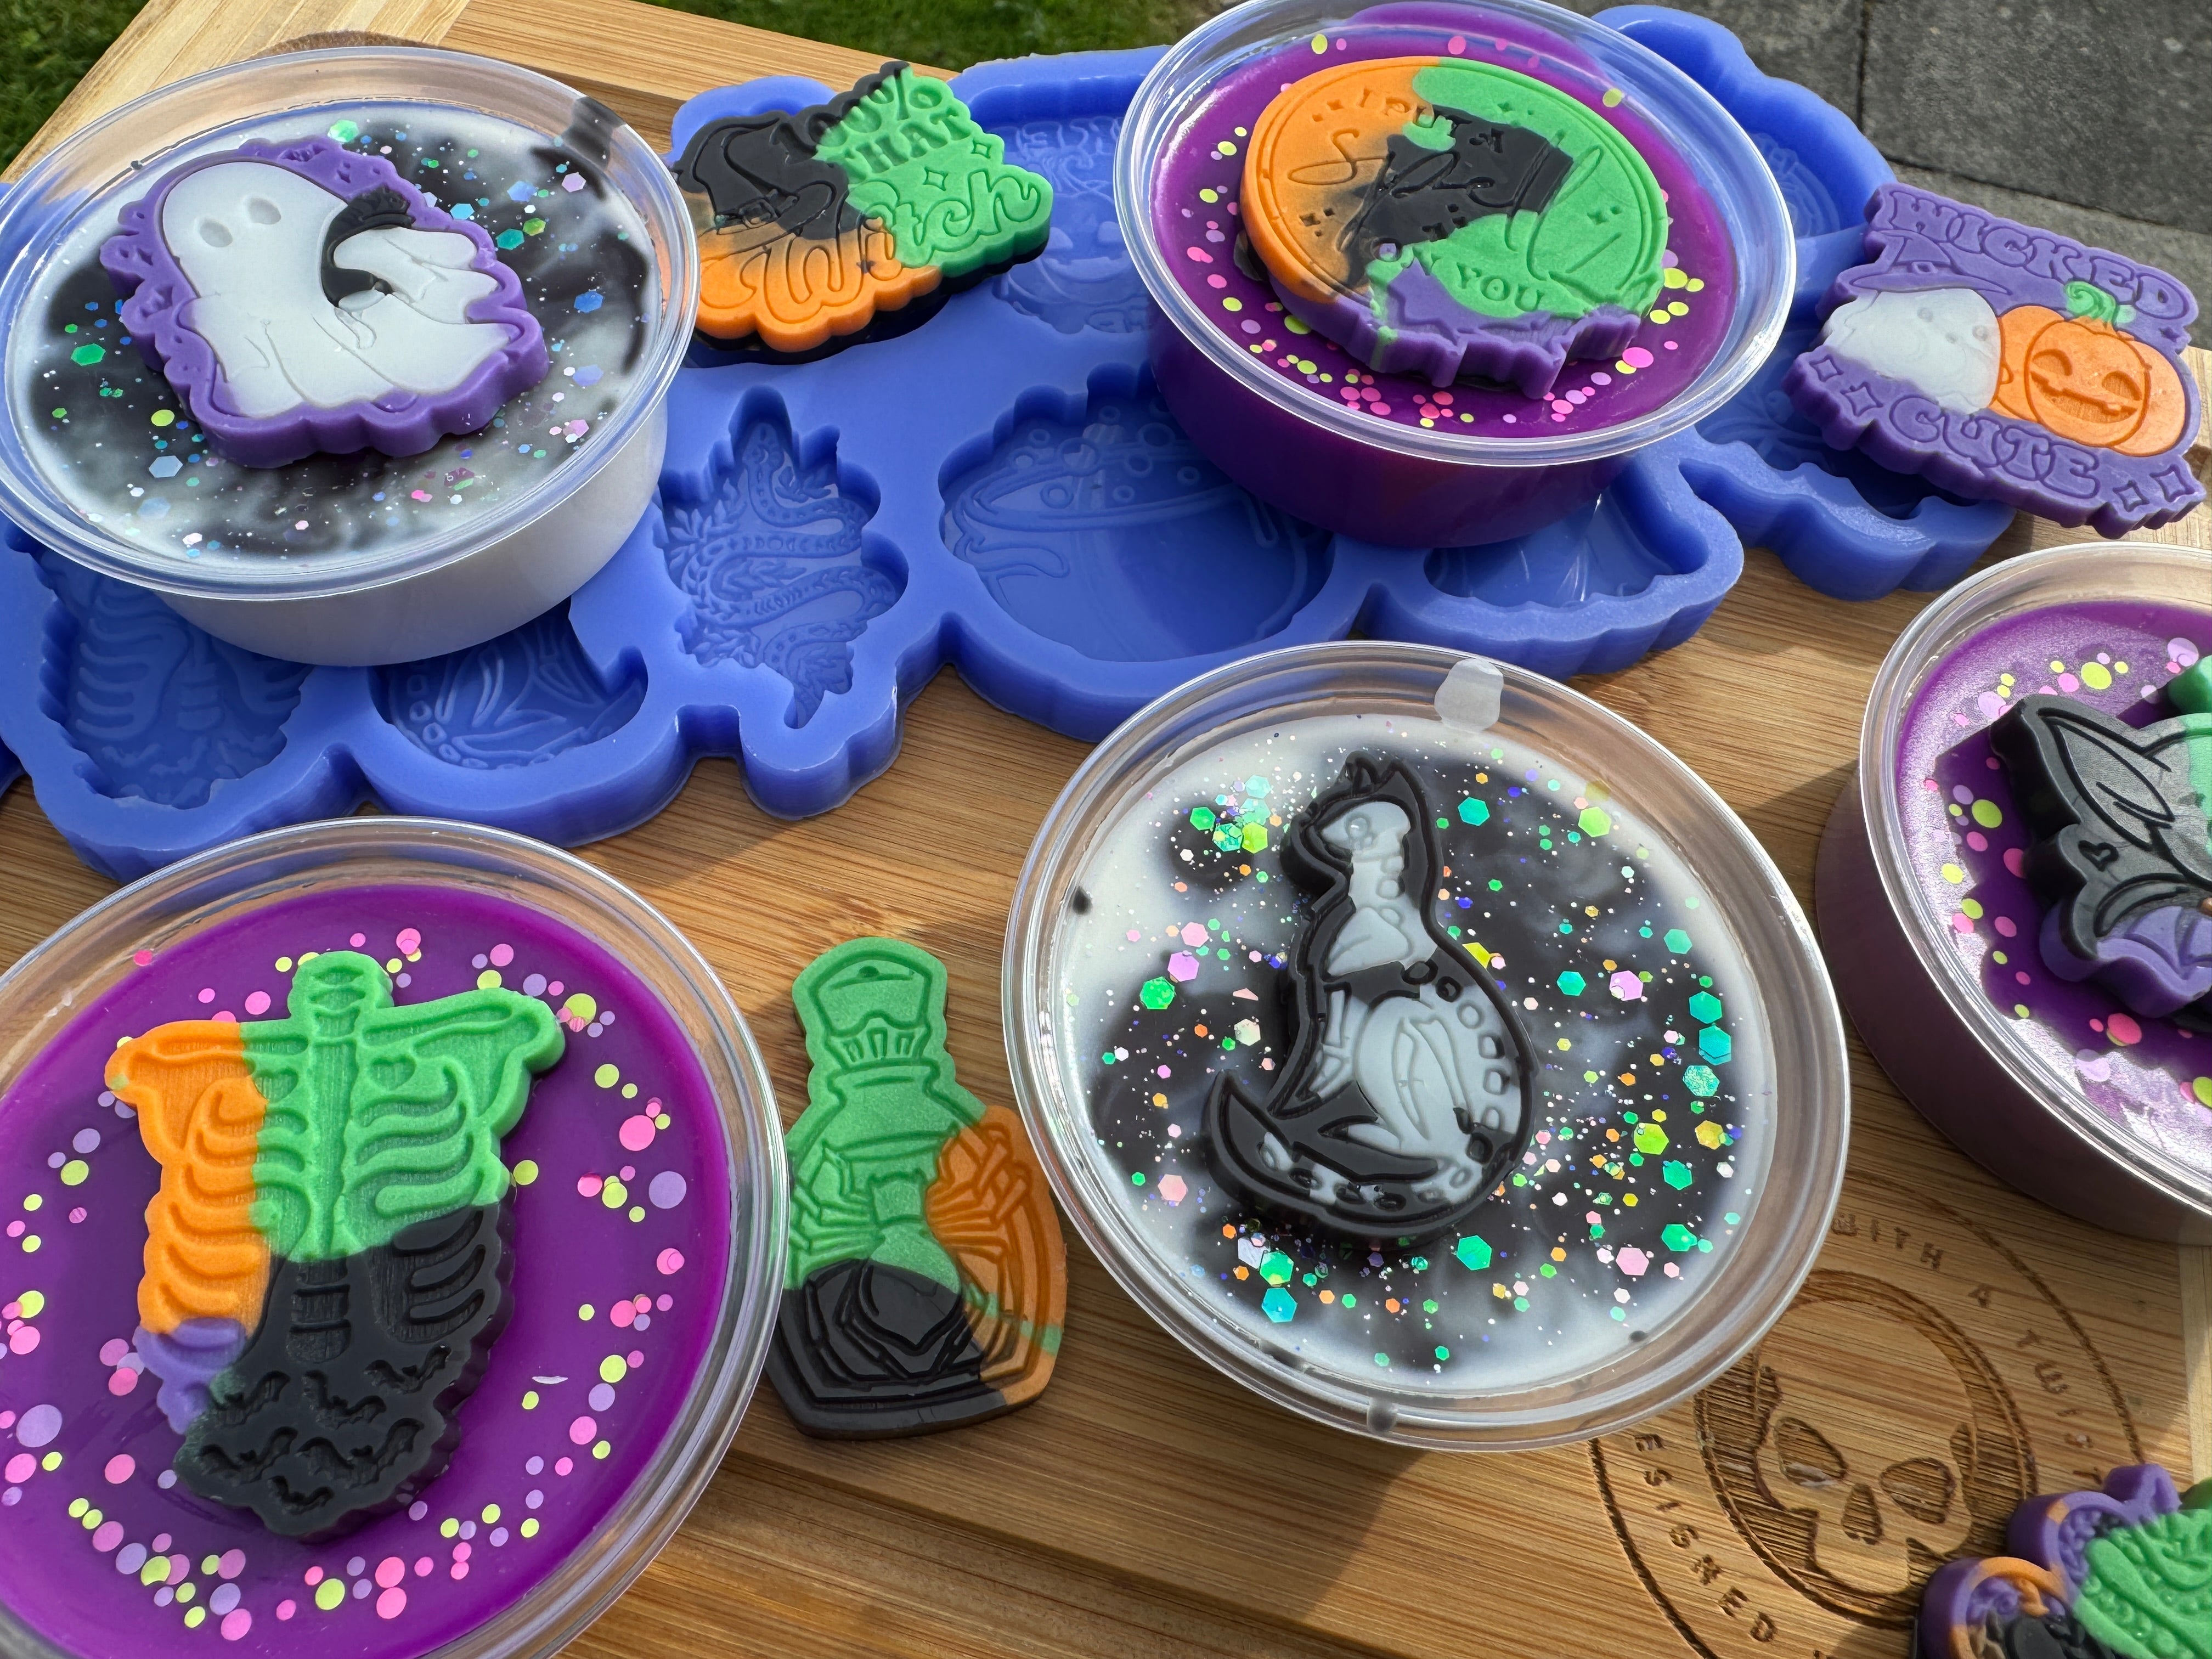
Lately, we’ve received quite a few requests for topper moulds, so naturally, we got working. Keeping with our autumn theme, we’ve created some fabulous designs that we know you’ll love. I’ll admit, I’m still learning on the job and didn’t know much about topper moulds at first. So, if you’re like me and wondering what they are, I did a bit of research – there’s what I found.
What Exactly is a Topper Mould?
Topper wax melt moulds are specialised silicone moulds that allow you to craft small, detailed designs to place on top of your wax melts. Think of them as the icing on the cake – they elevate the look of your wax melts with delightful shapes like flowers, stars, or any other creative design you can dream up. Whether you’re making gifts or selling handmade melts, these toppers add a unique, professional touch.
Why Use Toppers?
One of the best things about using topper wax melt moulds is that they allow you to personalise each melt in a way that reflects you, your style and creativity. Love a design but want to make it seasonal? Add a topper. Feeling inspired to switch things up a bit? A topper lets you do that too. It’s a simple way to add a little more flair and personality to your creations.
What can they be used for?
Here’s a few examples to sink your teeth into:
- Add them on top of a candle: Make your candles stand out with beautiful wax toppers.
- Enhance an existing design: Take a simple wax melt and turn it into something special.
- Place them on top of a pot of wax: The classic method that adds a touch of elegance to any melt.
- Create something entirely new: Combine a few toppers and get creative with a brand-new design. Check out our video for a visual guide on how Corinne did just that using our Plain Slab mould!
How to Get Started
Getting started with topper wax melt moulds is easier than you think! Here’s a simple step-by-step guide:
- Melt Your Wax: Start by melting your wax in a double boiler or using a wax warmer. Add your fragrance oils and dyes at this stage to create your base melts.
- Prepare Your Mould: While your wax is melting, set up your silicone topper mould. Make sure it’s clean and ready to go!
- Pour and Let Set: Pour your melted wax into the mould, making sure to fill each cavity carefully. Let the wax cool and set completely.
- Pop Out the Toppers: Once the wax has hardened, gently pop the toppers out of the mould. You’ll have perfectly shaped decorative pieces ready to adorn your melts.
- Place on Your Melts: Simply place the toppers on top of your wax melts before packaging or presenting them. Voilà! You’ve just created a stunning wax melt with an artistic twist.
Challenge!
Now, here’s a fun little challenge: I’m kind of curious to see how creative we can get with these topper moulds. Can they be used for something different? Is anyone willing to accept the challenge and see what weird and wonderful uses they can come up with? What about any bakers, chocolatiers or artists?
Let or me know if they can be used it a different way!
I want to see all your makes so as always, head on over to our Facebook Group and share your creations with us - and don’t forget to check out our shop for the latest moulds and crafting accessories.
Until next time, keep crafting with a twist!
Love, Toni x
Ps did you get your NEWSLETTER email? Who is excited?


